The Beginner’s Guide to Understanding Your Body Type Before You Shop
You buy a jacket that looked great on the mannequin, get it home, and it just doesn’t sit right. Not because it’s a bad jacket — because it was cut for a body that isn’t quite yours.
This happens constantly, and most men respond by blaming the item, the brand, or their own body, when the real issue is simpler: nobody ever taught you how to shop for the body you actually have.
Understanding your body type isn’t about fitting into a category or being told what you “can’t” wear. It’s the opposite — it’s a tool that helps you walk into a store (or shop online) already knowing what’s likely to work, so you stop guessing, stop wasting money on pieces that never quite look right, and start buying with confidence.
This guide walks through how to actually identify your body type, what that means for fit and proportion, and exactly how to apply that knowledge every time you shop — without turning it into a rigid rulebook that ignores your personal style.
Why Body Type Matters More Than Trend or Brand
Clothing brands design around an “average” body shape — but almost nobody is exactly average. Two men can wear the same size medium shirt and look completely different in it, because size labels measure volume, not shape.
One man’s shoulders might be broader relative to his waist; another’s torso might be longer relative to his legs. The shirt fits both of them by the label, but it flatters neither the same way.
Once you understand your own proportions, shopping stops being a guessing game. You’ll know, before you even try something on, whether a slim-cut shirt is likely to work for you, whether you need to size up in the shoulders and tailor the waist, or whether a particular trouser rise is going to elongate or shorten your legs.
That knowledge saves money, saves time, and consistently produces better results than shopping by trend or size label alone.
Step 1: Identify Your General Body Shape
Before diving into specific style advice, it helps to understand the six general body shape categories used throughout this guide. These aren’t rigid boxes — most men are a blend of two, and that’s completely normal.
Slim
What it looks like: Narrow shoulders relative to a lean overall frame, minimal muscle bulk, often a straighter silhouette from shoulders to hips with less visible waist taper.
How to identify it: Clothes in your size often feel like they have consistent extra room throughout — shoulders, chest, and waist all tend to run loose at the same time, rather than fitting snugly in one area and loosely in another.
Athletic
What it looks like: Broader shoulders and chest relative to a comparatively narrower waist, visible muscle definition, and a more pronounced V-taper from shoulders to hips.
How to identify it: Shirts that fit through the shoulders and chest often feel tight or restrictive through the arms and upper back, while still fitting loosely at the waist — a common source of frustration when shopping off-the-rack.
Broad
What it looks like: A fuller build through the chest, shoulders, and midsection, with less dramatic taper between the chest and waist compared to an athletic frame.
How to identify it: Clothes often fit well through the shoulders but feel tight through the midsection, or vice versa — finding one size that works evenly across the whole torso can be difficult.
Tall
What it looks like: Above-average height, often with proportionally longer limbs and torso relative to standard clothing sizing, which is generally built around average height assumptions.
How to identify it: Sleeves, trouser hems, and jacket lengths consistently run short, even when the chest, shoulder, and waist measurements otherwise fit correctly.
Short
What it looks like: Below-average height, often with proportions where standard clothing lengths (sleeves, trousers, jacket hems) run long relative to the body.
How to identify it: Trousers and sleeves consistently need shortening, and jackets or coats can visually overwhelm the frame if the length isn’t adjusted.
Plus-Size
What it looks like: A fuller overall build across the chest, midsection, and limbs, often requiring specific fit consideration around structure and drape rather than simply sizing up a standard cut.
How to identify it: Standard “sized up” clothing often adds excess fabric in the wrong places (like sleeve and torso length) rather than genuinely accommodating the actual proportions of a plus-size frame, which is why plus-specific cuts tend to fit noticeably better than simply going up a size in a standard cut.
Stylist Tip: Most men are a combination of two categories — for example, tall and slim, or broad and athletic. Read the advice for both categories that apply to you and blend the guidance accordingly.
Read also: 10 Grooming Habits That Make Your Outfit Look 10x Better
Step 2: Take Your Own Measurements (You Only Need Four)
You don’t need a tailor’s full measuring kit to shop smarter — four measurements cover almost everything you need to know.
| Measurement | How to Take It | Why It Matters |
|---|---|---|
| Shoulder width | Seam to seam across the back of a well-fitted shirt you own | Determines jacket, shirt, and coat sizing — the hardest area to alter |
| Chest | Around the fullest part of your chest, under the arms | Confirms sizing accuracy beyond the label |
| Waist | Around your natural waistline, where trousers sit | Key for trousers and jacket fit |
| Inseam | Inside leg length, from crotch to ankle | Determines the correct trouser length before hemming |
How to use these: Write them down and keep them on your phone. When shopping online, compare your actual measurements against a brand’s specific size chart rather than relying on the labeled size (S/M/L or numeric) alone — sizing varies significantly between brands and even between different cuts within the same brand.
Shopping Tip: If you don’t own a well-fitted shirt to reference for shoulder width, ask a tailor to take this single measurement for you — it’s usually quick and sometimes free if you mention you’re a returning or potential customer.
Step 3: Style Guidance by Body Type
For Slim Builds
The goal: Add visual weight and structure without looking like you’re wearing someone else’s clothes.
What works:
- Slightly relaxed or structured tops (textured knits, layered pieces) that add shape without needing to size up dramatically.
- Horizontal design elements — chest pockets, contrast cuffs, layered pieces — which add visual width.
- Mid-weight fabrics with some body (heavier cotton, wool blends) rather than very thin, drapey materials that can emphasize a lack of bulk.
Common mistakes:
- Wearing everything oversized in an attempt to “add bulk,” which usually just reads as ill-fitting rather than intentional.
- Sticking exclusively to very thin, clingy fabrics that emphasize a narrow frame rather than building it out.
Fit Tip: A slightly boxy or structured jacket, rather than a slim-cut one, often adds more shape and presence to a slim frame than a fitted style would.
Example outfit: A textured, slightly relaxed crewneck sweater, straight-leg trousers, and Chelsea boots — the sweater adds visual bulk through texture without needing to be oversized.
For Athletic Builds
The goal: Accommodate the shoulder-to-waist taper without the shirt or jacket looking either tight through the arms or baggy at the waist.
What works:
- Shirts and jackets labeled “athletic fit” specifically, which are cut with more room through the chest and shoulders and less through the waist.
- Stretch-blend fabrics for shirts and trousers, which move with muscle definition rather than restricting it.
- Trousers with a slightly higher stretch content through the thigh, if that area tends to run tight.
Common mistakes:
- Sizing up an entire shirt just to fit the shoulders and chest, resulting in excess, sloppy fabric at the waist.
- Buying very slim-cut trousers that restrict movement through athletic thighs.
Fit Tip: If you can’t find true “athletic fit” options, buy for your chest and shoulder measurement and have the waist tailored in — this is usually a straightforward, inexpensive adjustment.
Example outfit: A stretch-blend button-up with an athletic cut, tailored chinos with a bit of give through the thigh, and clean leather derbies.
For Broad Builds
The goal: Create clean, structured lines that work with a fuller torso rather than clinging tightly or drowning it in excess fabric.
What works:
- Structured fabrics with a bit of stiffness (like a mid-weight cotton or wool blend) that hold their shape rather than clinging.
- Vertical design elements — placket details, vertical seams — that create a leaner visual line.
- Jackets and shirts with a slightly relaxed, straight cut rather than either very fitted or very boxy.
Common mistakes:
- Choosing overly tight, clingy fabrics that emphasize every contour rather than creating a clean silhouette.
- Going several sizes up “to be safe,” which often adds excess bulk rather than genuinely improving fit.
Fit Tip: Prioritize finding the correct chest and shoulder size first, then tailor the waist specifically, rather than trying to find one size that works perfectly everywhere without any adjustment.
Example outfit: A structured, straight-cut overshirt, straight-leg (not skinny) trousers, and a clean minimal sneaker — structure and straight lines throughout, rather than tight or baggy extremes.
For Tall Builds
The goal: Ensure length — sleeves, trousers, torso — actually reaches where it should, since most standard sizing assumes average height.
What works:
- Brands or specific lines labeled “tall” fit, which add proportional length through the sleeves, torso, and inseam rather than just sizing up overall.
- Layering, which can help balance a longer torso and break up a tall silhouette into visually distinct sections.
- Slightly longer jacket lengths, which look proportional on a taller frame rather than cropped or short.
Common mistakes:
- Buying a larger overall size to get enough length, which usually results in a shirt or jacket that’s now also too wide through the chest and shoulders.
- Wearing trousers that are visibly too short (unless deliberately styled as a cropped, ankle-length look), which reads as ill-fitting rather than intentional.
Fit Tip: If a “tall” fit isn’t available, buy for chest and shoulder fit first, and budget for tailoring or hemming to extend sleeve and trouser length slightly if needed, rather than compromising on the torso fit.
Example outfit: A slightly longer overshirt layered over a plain tee, straight-leg trousers hemmed to the correct length for your actual height, and a minimal sneaker.
For Short Builds
The goal: Avoid excess length that visually shortens the frame further, and keep proportions clean and tailored.
What works:
- Higher-rise trousers, which elongate the leg line by shifting the visual waistline upward.
- Shorter jacket lengths, which avoid overwhelming a shorter torso with excess fabric below the waist.
- A minimal, clean break at the trouser hem (little to no break), which avoids visually cutting the leg line short.
Common mistakes:
- Wearing oversized jackets or coats that extend well past the hip, which can make the whole frame look smaller and less proportional.
- Wearing trousers with excessive break or bunching at the ankle, which visually shortens the leg further.
Fit Tip: Vertical stripes, monochromatic outfits (similar tones head to toe), and higher-rise trousers all work together to create a longer, leaner visual line.
Example outfit: A monochromatic outfit in navy or charcoal — trousers, shirt, and jacket in closely related tones — paired with a clean, no-break trouser hem and minimal sneakers.
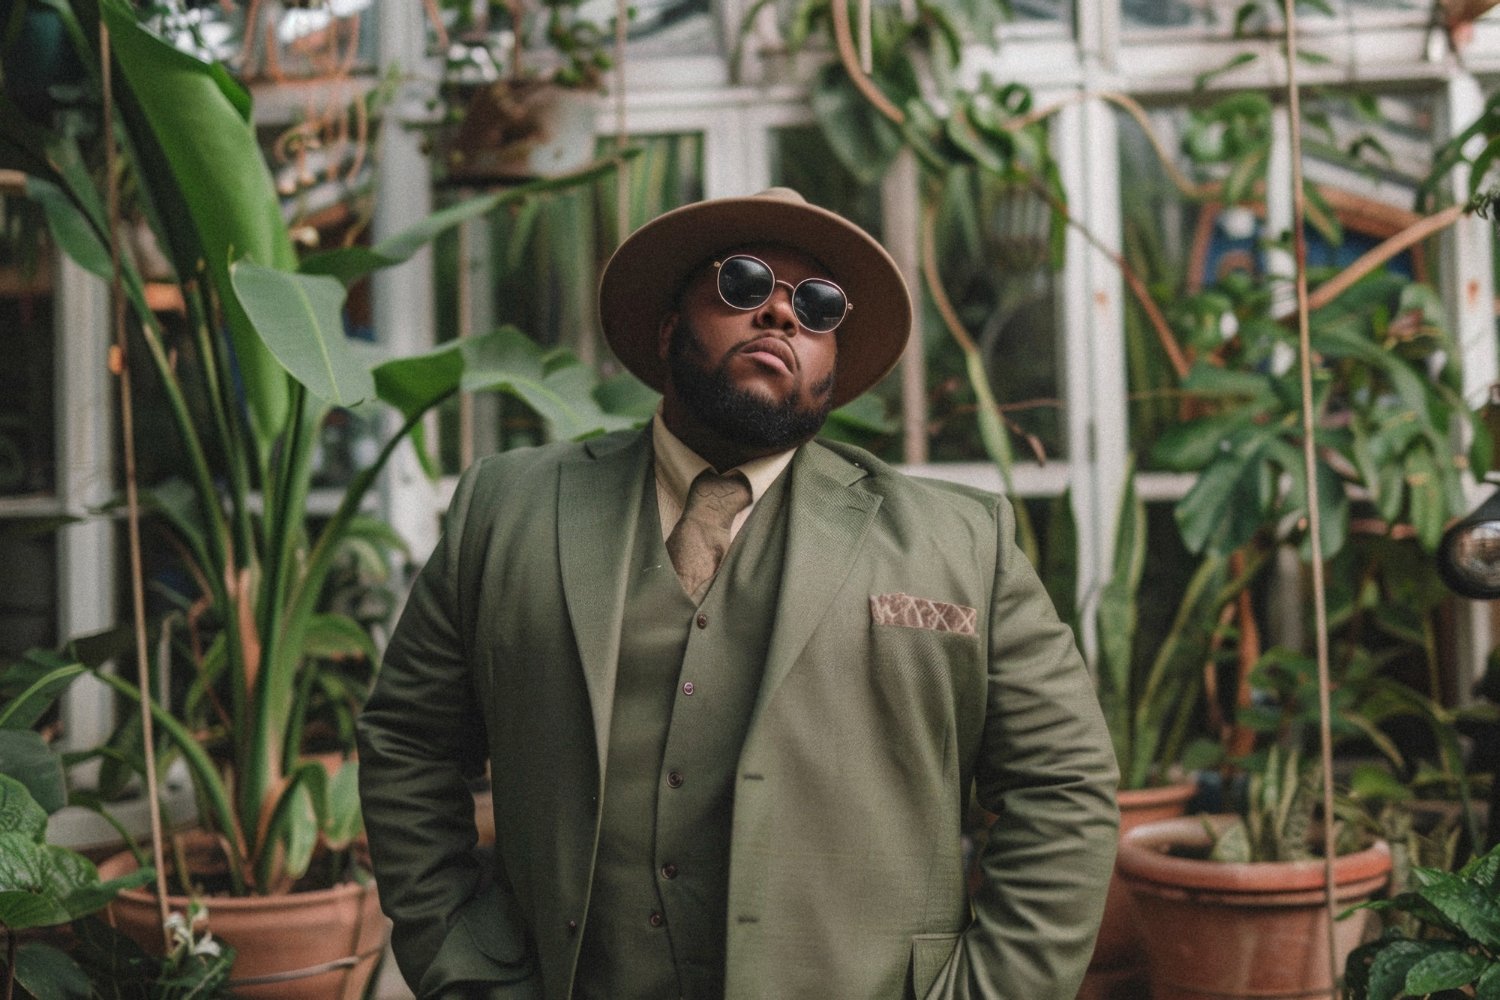
For Plus-Size Builds
The goal: Prioritize structure and correct proportional length over simply sizing up a standard cut, since standard cuts often add excess fabric in the wrong places rather than genuinely accommodating the body.
What works:
- Plus-specific clothing lines, which are cut with different proportions (not just a scaled-up standard size) and generally fit noticeably better through the shoulders, sleeves, and torso length.
- Structured fabrics with some stretch, which hold shape and move comfortably without clinging or bunching.
- Vertical design details — vertical seams, placket lines, structured layering — which create a cleaner, more elongated visual line.
Common mistakes:
- Assuming a standard cut sized up will fit the same way a plus-specific cut would — sleeve and torso length often remain mismatched even after sizing up.
- Avoiding fitted pieces entirely in favor of very loose, oversized clothing, which often adds visual bulk rather than reducing it.
Fit Tip: A well-fitted, slightly structured shirt with clean shoulder placement will almost always look sharper and more intentional than an oversized shirt chosen to “hide” the body. Correct fit, not extra room, is what creates a clean silhouette.
Example outfit: A structured button-up in a plus-size cut, tailored straight-leg trousers, and clean leather shoes — structure and correct proportional length throughout.
Step 4: Understand How Proportion Works With (Not Against) Your Shape
Beyond your general body category, proportion — the relationship between your top half and bottom half, and between fitted and relaxed pieces — plays a major role in how any outfit looks on you specifically.
The core principle: If one piece is relaxed or oversized, balance it with something more fitted elsewhere. Two loose pieces together tend to erase shape entirely; two very tight pieces together tend to look restrictive rather than intentional.
How this interacts with body type:
- A slim build wearing a relaxed top benefits from keeping the bottom half slimmer, to avoid disappearing into excess fabric on both ends.
- An athletic or broad build wearing a fitted top usually benefits from a straighter, not skin-tight, trouser, to avoid an overly tight, restrictive silhouette.
- A tall build benefits from breaking the silhouette into clear sections through layering, rather than one long, uninterrupted line top to bottom.
- A short build benefits from minimizing visual breaks (like a big contrast between top and bottom color) to keep the eye moving in one continuous line.
Common Mistake: Copying an outfit exactly as seen on someone with a different body type or proportion, without adjusting the fit or balance to suit your own frame — the same combination of pieces can look completely different depending on the wearer’s proportions.
Step 5: Apply This Knowledge Every Time You Shop
Once you understand your body type and proportions, use this simple process every time you’re buying something new:
- Check the fit description, if available — “athletic fit,” “tall fit,” “slim fit,” “relaxed fit” — and choose the one that matches your body type category.
- Compare your own measurements against the specific size chart, not just the generic size label.
- Try it on and check three things: the shoulder seam placement, whether you can comfortably move and sit, and the length (sleeves, trousers, jacket hem).
- Factor in tailoring for anything that’s close but not quite right — most fit issues outside the shoulders can be corrected relatively easily and affordably.
- Walk away from anything that requires “sizing up everywhere” just to fit one area — this usually signals the wrong cut for your body type, not the wrong size.
Budget Tip: Once you know your body type and general measurements, you’ll waste significantly less money on items that don’t work, since you can rule out poor fits before ever making a purchase — particularly useful for online shopping, where trying before buying isn’t an option.
Common Mistakes Men Make When Shopping Without Knowing Their Body Type
Mistake 1: Buying by size label alone. Sizing varies dramatically between brands and cuts — a “medium” in one brand can fit like a “large” in another, which is why measurements matter more than the label itself.
Mistake 2: Assuming one problem area means the whole size is wrong. Often, only one specific measurement (shoulders, length, waist) is actually off — understanding your body type helps you identify and address that specific issue rather than abandoning an otherwise good piece.
Mistake 3: Copying an outfit exactly as shown, regardless of body type. An outfit that works well on one build can look completely different on another — understanding your own proportions lets you adapt the same general idea to your specific frame.
Mistake 4: Believing certain styles are permanently “off-limits.” Body type awareness is about knowing what typically works well and why — not about eliminating entire categories of clothing. Understanding the principle allows for informed adjustments (sizing, tailoring, layering) rather than blanket avoidance.
Mistake 5: Never revisit body type as it changes. Bodies shift over time — through training, aging, or lifestyle changes — and clothing that fit well previously may need reassessment periodically rather than being assumed to still fit the same way indefinitely.
Frequently Asked Questions
1. How do I know which body type category I actually fall into? Compare your shoulder, chest, and waist measurements, and notice where off-the-rack clothing typically fits well versus poorly — that pattern usually reveals your general category, or a blend of two.
2. What if I’m a combination of two body types, like tall and athletic? That’s common and completely normal. Read the guidance for both applicable categories and combine the relevant advice — for example, prioritizing an athletic cut while also budgeting for extra sleeve and trouser length.
3. Do I need to buy from specific “body type” clothing lines to dress well? No, though they can help. Understanding your proportions lets you identify well-fitting pieces from any retailer and know exactly what, if anything, needs tailoring afterward.
4. Can my body type change over time? Yes — through changes in fitness, age, or lifestyle. It’s worth reassessing your measurements and typical fit issues periodically, particularly if your regular clothing has started fitting noticeably differently.
5. Is it worth paying for tailoring if I already understand my body type? Yes, in most cases. Even with a strong understanding of your body type, off-the-rack clothing is built for an “average” version of that category — tailoring closes the remaining, smaller gaps for a genuinely personalized fit.
6. What’s the most common fit mistake for slim builds specifically? Sizing up dramatically to add bulk, which usually results in an oversized, ill-fitting silhouette rather than the intended effect — textured, structured fabrics in the correct size generally work better.
7. What’s the most common fit mistake for broad or plus-size builds specifically? Choosing overly loose clothing in an attempt to “hide” the body, which often adds visual bulk rather than reducing it — structured, well-fitted pieces typically create a cleaner, more flattering silhouette.
8. How do I take my own measurements accurately without help? Shoulder width is easiest measured from a well-fitted shirt you already own; chest and waist can be measured directly with a flexible tape measure, worn snug but not tight, around the fullest points.
9. Should I trust “athletic fit” or “tall fit” labeling from every brand equally? Not entirely — these labels vary somewhat between brands. Use your own measurements against each brand’s specific size chart to confirm, rather than assuming the labeling is universally consistent.
10. Does understanding my body type limit what I can wear? No — it does the opposite. It helps you understand why certain fits and proportions work well for your frame, so you can adjust confidently (through sizing, cut, or tailoring) rather than avoiding entire categories of clothing unnecessarily.
Final Thoughts
Understanding your body type isn’t about fitting into a rigid category — it’s about finally shopping with information instead of guesswork. Once you know your general shape, your key measurements, and how proportion works with your specific frame, you’ll waste far less money on pieces that never quite work, and you’ll walk into every purchase — in-store or online — already knowing what’s likely to succeed.
Start by taking your four key measurements this week, and try on a few pieces you already own with fresh eyes, checking shoulder placement, length, and overall proportion. From there, every future purchase gets easier, faster, and considerably more reliable.
Read also: